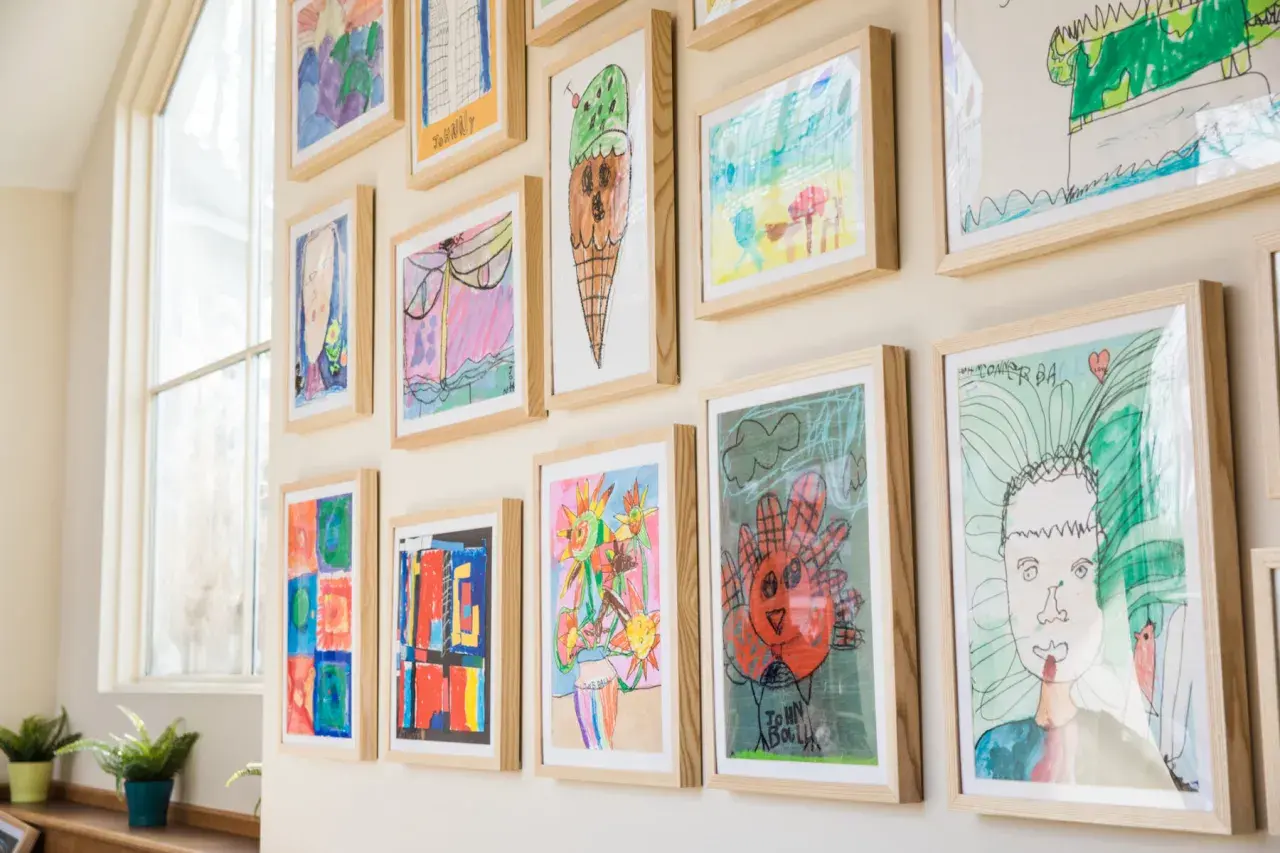
A children’s art display can do more than clear paper off the fridge: it can make a hallway, landing, or playroom feel lived in, personal, and finished. A kids art gallery wall works best when it is edited like real decor, not pinned up in a rush, so the shapes, spacing, and frames all do some of the work. In this guide, I cover the display systems that suit changing artwork, the layout rules that keep the wall calm, and the sustainable choices that make sense in a UK home.
The essentials at a glance
- Choose a display method that matches how often the artwork will change.
- Keep most frames 2 to 4 inches apart so the wall reads as one composition.
- Aim to fill about 70 to 75 percent of a feature wall, not every centimetre.
- Hallways, landings, stairs, playrooms, and kitchen corners usually work better than formal rooms.
- Reuse frames where you can, and look for FSC wood, recycled metal, or low-VOC paint.
- Build in a rotation system so new drawings can arrive without the wall becoming cluttered.
Why this kind of wall works in a real home
The reason I like a children’s artwork wall is simple: it gives family life a place on the walls without making the room feel messy. When I plan one, I try to balance sentiment with restraint. The art should feel celebrated, but the display itself should still behave like part of the interior, not like a temporary noticeboard.
That balance matters because children make a lot of art, and not every piece deserves permanent display. If you edit the wall carefully, the strongest drawings, paintings, and collage pieces become a small collection with real presence. The result is a room that feels warmer and more personal, while using what you already have instead of buying new decor every time the mood changes.
I also think it helps children see their work treated seriously. A properly hung piece tells them, quietly, that creativity has value. Once that intention is clear, the next decision is the hanging system, because that determines how easy the wall will be to live with.
Choose the display system that suits the room and how fast the art changes
There is no single right way to build a display wall for children’s artwork. The best option depends on how often you want to swap pieces, how much wall damage you can tolerate, and whether you want the wall to feel polished or playful. In a UK home, I often think in terms of four practical systems: framed pieces, picture rails, clip-based hangs, and ledges or boards.
| Display method | Best for | Why I choose it | Rough UK budget |
|---|---|---|---|
| Framed grid | A calm, permanent look | Cleanest finish and easiest to tie into the rest of the decor | £80 to £250 for a small wall if the frames are new |
| Picture rail | Homes where the art changes often | Easy to swap work without repainting or making lots of new holes | £25 to £80 for a basic section, more for decorative rails and hardware |
| Clip wire | Playrooms and fast-changing displays | Cheap, flexible, and good when new drawings arrive every week | £10 to £40 |
| Wall ledge | Mixed sizes and layered styling | Lets you move pieces around without rehanging everything | £20 to £100+ |
| Pinboard or felt board | Younger children and schoolwork-heavy walls | Soft, easy to use, and practical for notes as well as art | £20 to £80 |
Those figures are rough and depend on wall size, finish, and whether you reuse anything you already own. My own rule is straightforward: if the wall needs to change every few weeks, I reach for a rail or clip system; if I want a quieter, more architectural look, I choose frames. Older UK homes often suit picture rails especially well, because they sit naturally in the room and make updates far less painful.
One more thing: no-drill fixings are useful in rentals, but they are not a magic answer for heavy frames. If you plan to hang glass-fronted pieces, use proper fixings for the wall type and treat adhesive hooks as a light-duty option only. Once the hardware is right, the layout rules decide whether the finished wall feels composed or accidental.
Plan the layout before the first hole goes in
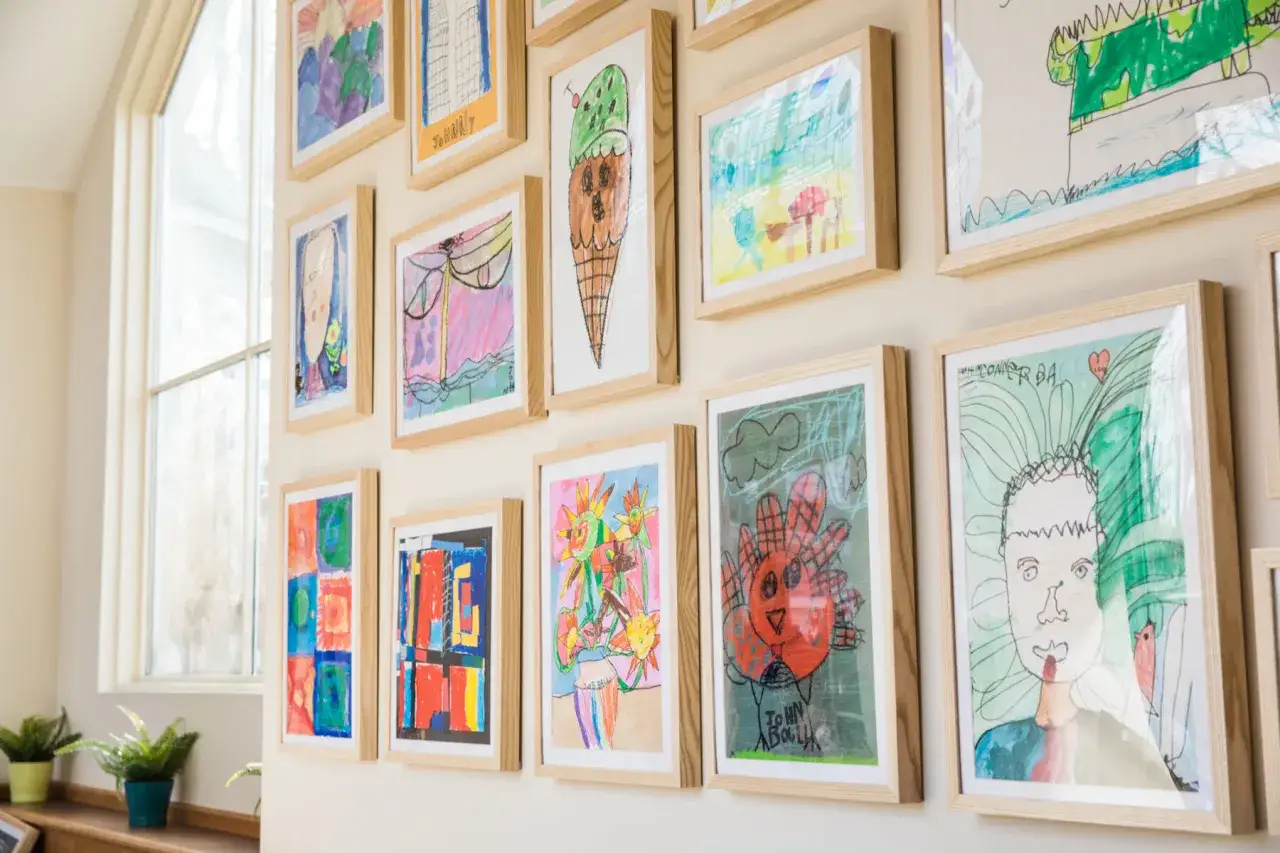
The biggest difference between a wall that feels curated and one that feels chaotic is planning. I rarely hang anything straight from the box. Instead, I map the arrangement first, because children’s art is visually lively and can become messy very quickly if every frame is a different size and every gap is guessed on the spot.
- Measure the wall and decide how wide the display should be. For a feature wall, I usually aim to fill roughly 70 to 75 percent of the available area.
- Cut paper templates from old packaging or recycled card so you can test the layout on the wall before drilling.
- Choose one anchor piece, usually the largest or most colourful work, and build around it.
- Keep most frames 2 to 4 inches apart. That is enough breathing room for the eye to read each piece without fragmenting the display.
- Repeat at least one element, such as frame colour, mount colour, or material finish, so the wall feels intentional.
- Step back and check the composition from the doorway, not just up close.
I also pay attention to height. A common starting point is to place the centre of the arrangement around eye level, then adjust for the room. On a staircase, the wall can rise with the line of the stairs; in a playroom, I would often sit the pieces a little lower so children can actually see their work. Small drawings usually benefit from wider mounts, because they stop the wall from looking crowded and give the work a proper sense of scale.
If you want the wall to feel even calmer, reduce the colour palette rather than the number of pieces. A dozen bright drawings can still work if the frames are consistent and the spacing is disciplined. Where you place the wall matters almost as much as how you build it, especially in a UK home with narrow corridors or steep stairs.
The best places in a UK home for children’s artwork
I would usually start with transitional spaces before I touch the main living room. Hallways, landings, stair walls, and kitchen diners are ideal because they already act like passage points; a display wall adds personality without competing with furniture. In more compact homes, that is often the smartest use of wall space.
- Hallway - Good for a tidy, continuous row or a stacked salon-style group. You see it often, but it does not dominate the room.
- Staircase wall - Excellent for a vertical run of frames that follows the architecture. It is one of the easiest places to make a small display feel substantial.
- Playroom - Best for a more relaxed, child-led setup with clips, ledges, or a board. This is where flexibility matters most.
- Bedroom - Works well when you want the child’s room to feel personal, but I would keep the display lower and simpler.
- Kitchen diner - A good compromise if you want the wall to be part of daily family life without moving into formal territory.
I usually avoid the most formal rooms unless the home already has a relaxed, eclectic feel. A primary sitting room or elegant dining room can take children’s art, but only if the framing is disciplined and the rest of the decor can support it. In a smaller flat, one well-chosen corner display is often stronger than trying to spread the art everywhere. The last layer is the material choice, because that affects durability, safety, and how sustainable the project really is.
Materials and finishes that keep it practical and lower impact
This is the part that makes the project feel considered rather than disposable. If I am building a wall for children’s artwork, I look first at what I can reuse: old frames, leftover mounts, spare hooks, and even offcuts of backing board. A display wall does not need all-new components to look good, and that is where the sustainable choice becomes the smarter choice too.
- FSC-certified wood frames - A solid option if you are buying new and want to avoid unnecessary waste.
- Reclaimed or second-hand frames - Often the easiest way to add character and cut cost at the same time.
- Recycled metal rails - Useful if you want a slimmer, more industrial finish for a picture rail system.
- Acid-free mount board - Better for paper art because it slows yellowing and protects the edges.
- Low-VOC paint - VOCs are volatile organic compounds, and low-VOC paint gives off fewer of them, which is better for indoor air quality.
- Acrylic glazing in active rooms - Safer than glass in a playroom or child’s bedroom because it is less likely to shatter.
Wall type matters as well. UK homes often have either plasterboard, older plaster, or masonry walls, and each one needs different fixings. If the wall is bright and sunny, I would think about UV-filtering glazing or at least avoid hanging the most precious originals in direct light. That is the part people forget: a well-designed wall should also protect the work it is showing. Once the wall is built well, the final job is keeping it alive without letting the room fill up with paper.
Keep the wall alive as the drawings change
The display only works long-term if there is a rotation system. Children create quickly, and a wall that never changes will eventually start to feel static. I usually plan for a set number of slots and a separate archive box, so nothing is lost even when it is not on show.
My practical rhythm is to refresh the wall every 4 to 6 weeks, or at the start of each half term if the pace is high. That schedule is slow enough to avoid constant re-hanging and fast enough that the child still feels the wall belongs to them. If a child is older, I like to give them a say in the edit: ask them to choose the three favourites, then build the rest of the wall around those.
There are a few small habits that make the whole system easier:
- Photograph each piece before storing it.
- Keep a flat folder or archive box for the works that are not currently displayed.
- Leave one or two empty spots so new art has somewhere to land.
- Use frames that open from the front if you expect frequent changes.
- Store spare mounts, clips, and hooks together so updates do not turn into a scavenger hunt.
The goal is not to save every drawing on the wall forever. The goal is to keep the display fresh, respectful, and easy to live with. A wall that changes with the child feels more alive than a wall that is packed full and never touched again.
What I would do first if I were starting from scratch
If I were building this from zero, I would keep the first version small and strong rather than oversized and fragile. I would pick one wall, choose either a rail or a frame system, and limit the first hang to the best 6 to 10 pieces. That gives the display enough weight to matter without forcing the room to carry too much colour at once.
From there, I would add one practical detail that often gets ignored: a storage plan. A good artwork wall is only half the system. The other half is the archive box, folder, or shelf that holds the rest without damaging it.
That is the version of a children’s display wall I would trust in a real home: edited, changeable, and built from materials that feel thoughtful rather than throwaway. It can be playful without becoming messy, and personal without fighting the rest of the decor. If you keep the layout disciplined and the materials sensible, the wall will keep doing its job long after the first drawings come down.