A built in bunk room can solve the oldest bedroom problem in the book: how to sleep more people without turning the room into a row of mismatched beds. I look at these spaces as compact pieces of architecture, not just furniture choices, because the best ones balance storage, safety, privacy and a calm feel. Done well, they work for children, guests, holiday homes and sibling bedrooms without becoming a novelty that ages badly.
What matters most before you build one
- Measure ceiling height, mattress depth and circulation together, not separately.
- Choose stairs or a ladder based on who will use the top bunk most often.
- Build storage, lighting and charging points into the design from the start.
- Use low-VOC finishes and durable timber if you want a more sustainable result.
- Expect bespoke joinery to cost more, but also to solve awkward room shapes better.
Why a bunk room works better than extra beds
The reason this idea keeps coming back is simple: it gives a bedroom a clearer job. Instead of squeezing in one more bed and hoping the room still feels usable, you create a sleeping zone that can handle siblings, sleepovers or visiting family while leaving the rest of the floor free. That matters in smaller UK homes, where every square metre has to work hard.
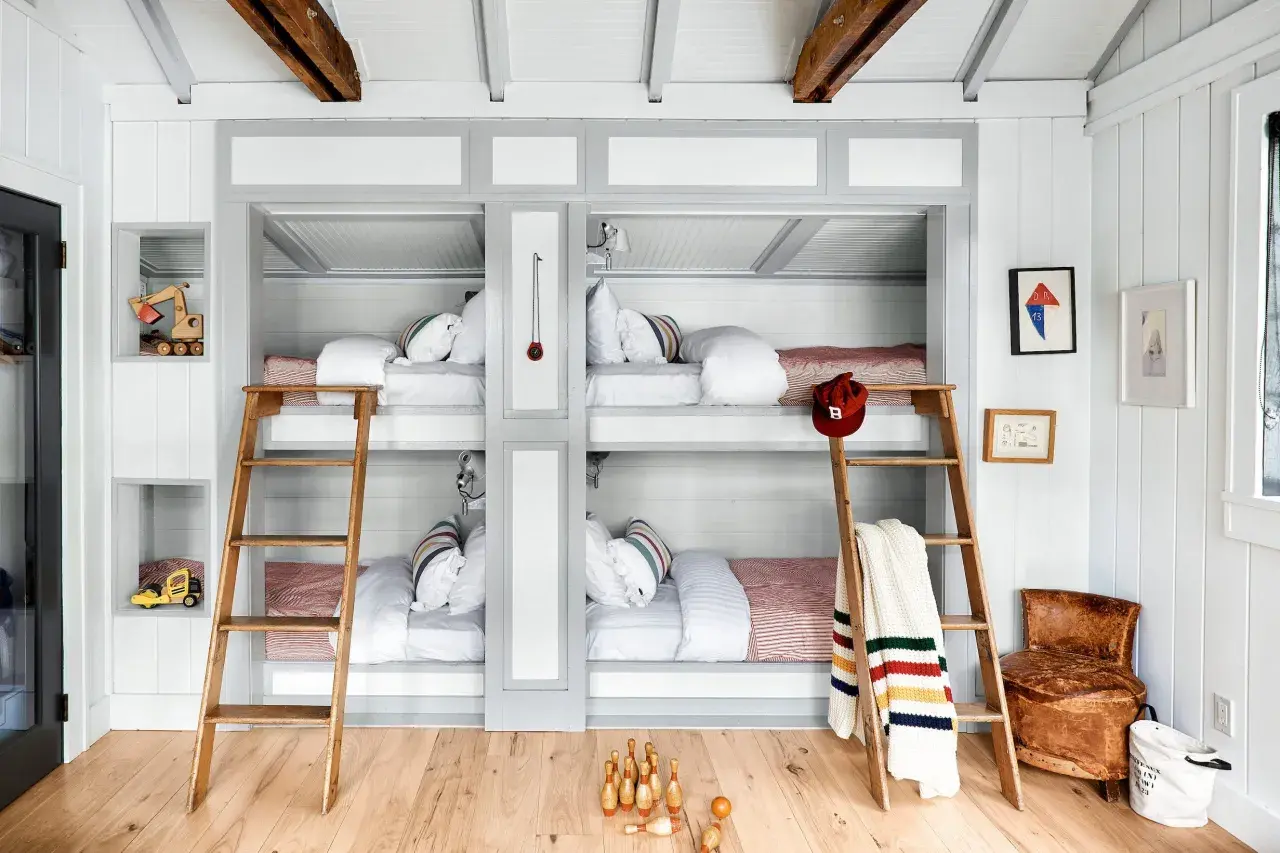
I also like the way a properly planned bunk room reduces visual clutter. A row of freestanding beds, loose bedside tables and travel bags quickly makes a room feel temporary. Built-in sleeping platforms, on the other hand, can make the room feel intentional, especially if the joinery includes cupboards, shelves or a reading nook. The room stops looking like overflow accommodation and starts looking like part of the house.
There is a practical side too. In a spare bedroom, attic conversion or holiday home, one well-designed sleeping wall often does more than two separate beds ever could. The trick is to treat it as a space plan first and a bed second. Once that shift happens, the layout choices become much easier to judge. That leads directly to the part where most projects succeed or fail: the configuration.
Layout options that make the room feel intentional
I usually sketch the mattress footprint first, then the access route, and only then the storage. That order prevents the design from becoming too pretty to live with. Here are the layouts I see working best.
| Layout | Best for | Why it works | What to watch |
|---|---|---|---|
| Single-wall bunks | Narrow bedrooms and loft rooms | Keeps the centre of the room open and gives the cleanest visual line | Can feel tight if circulation is poor or the room is very shallow |
| Alcove or recessed bunk wall | Rooms with chimney breasts, niches or awkward recesses | Makes use of space that would otherwise be hard to furnish | Needs careful measurements and good ventilation |
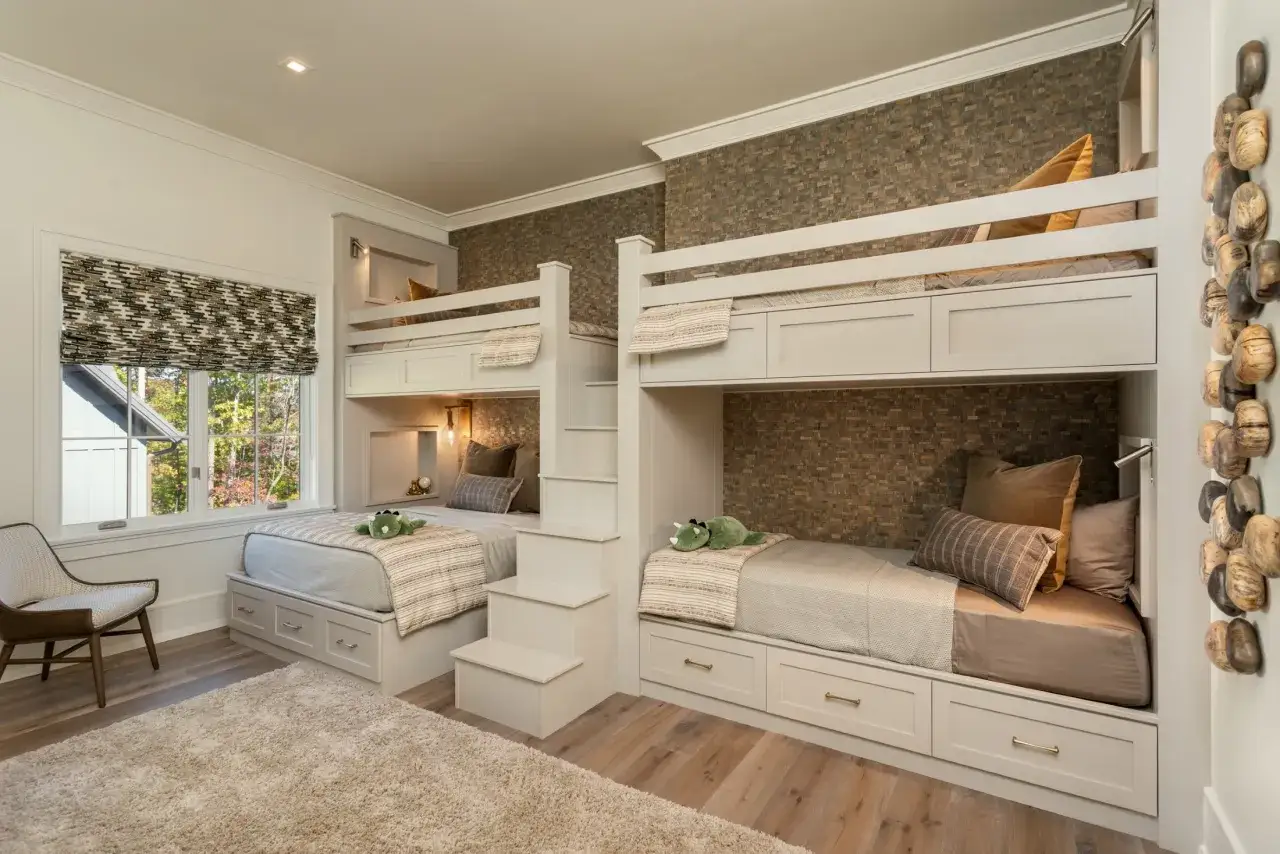
| L-shaped bunks | Rooms that need more privacy between sleepers | Breaks up the sleeping zone and feels less stacked | Uses more floor area than a straight run |
| Full-wall bunk and storage run | Holiday homes and shared sibling rooms | Can combine bunks, drawers, shelves and a stair unit in one composition | Costs more and can dominate a small room if the proportions are off |
If I had to choose one rule here, it would be this: the room should still feel easy to cross when the beds are made and the bags are open. If the layout forces people to squeeze past corners or twist around the ladder, it will frustrate users every day. Once the plan feels workable on paper, the next question is safety, because an integrated bunk room only succeeds when people can use it without hesitation.
Safety and access you should design in from day one
In the UK, I treat top-bunk use by children under six as a non-starter, and I keep the design generous enough that older children are not brushing the ceiling when they sit up. If the room is meant for guests or rental use, I would also check local accommodation rules, because some council standards for shared sleeping spaces are stricter than a private home.
- Protect the headroom. A bunk that technically fits can still feel wrong if the top sleeper has to duck every time they move.
- Keep the top mattress slim. A deep mattress eats into rail height quickly, so I avoid thick pillow-top styles on upper bunks.
- Choose stairs when the room is used often. Stairs take more space, but they are safer and easier than a steep ladder for younger children or tired adults.
- Fix the structure properly. Built-ins should be anchored by someone who understands load-bearing joinery, not treated like decorative shelving.
- Watch the window and lighting positions. Switches, outlets and window handles should stay clear of the climbing path.
For private bedrooms, I like to see at least enough room for someone to sit upright on the top bunk without feeling boxed in. As a rough planning check, a ceiling below about 2.4 m starts to feel restrictive fast, while some HMO-style standards in the UK use even higher benchmarks. That is why access details matter so much: once the bunk is safe, the room starts earning its keep through storage and comfort rather than just by stacking beds. From there, the finer details make the room pleasant rather than merely functional.
Storage, lighting and privacy that stop the room feeling crowded
This is where a bunk room goes from useful to genuinely good. If the beds are built in but the rest of the room still lacks places to put clothes, books and chargers, you have only solved half the problem. I prefer solutions that remove visual noise instead of adding decorative clutter.
- Under-bunk drawers. These are the easiest way to store bedding, games or off-season clothes without adding a separate chest of drawers.
- Recessed shelves. A small shelf beside each sleeping space is enough for a book, water bottle and phone.
- Individual reading lights. Separate lights stop one sleeper from disturbing the other and make the room feel more considered.
- USB-C and power points. In 2026, I would not build a bunk room without charging access at each berth.
- Privacy curtains or sliding panels. These soften the room visually and help children or guests feel that they have their own corner.
- Soft finishes. Curtains, rugs and upholstered head-end details absorb sound and reduce the echo that makes small rooms feel tense.
One detail I use often is a simple bedside niche rather than a bulky table. It keeps the room light on its feet and makes the built-in joinery look deliberate. Once those practical touches are in place, you can start thinking about the material palette itself, because the finishes will decide whether the room feels restful or harsh.
Materials and finishes that keep the room calm and sustainable
For a site that values smart, eco-conscious design, this section matters more than pure styling. I would rather see a restrained bunk room made from durable, repairable materials than a glossy one that needs replacing in five years. The greenest choice is often the one that lasts and can be refreshed instead of ripped out.
Solid timber, birch ply and FSC-certified joinery board are good starting points because they age well and can be repaired. Pair them with water-based paints or low-VOC finishes so the room feels healthier, especially if it is for children. For textiles, I lean towards organic cotton, recycled wool or other hard-wearing natural fibres rather than novelty fabrics that date quickly.
- Choose durable, repairable carcasses. If a panel gets damaged, it should be replaceable without rebuilding the whole unit.
- Use LED lighting. It is efficient, slim and easier to integrate into shelving or stair units.
- Keep the colour palette calm. Soft neutrals, muted greens and warm wood tones make the room feel larger and less busy.
- Avoid over-theming. Let bedding and artwork carry the character so the room can evolve later.
In practice, I think the best-looking bunk rooms are the ones that read as architecture first and decoration second. That approach also gives you more freedom with the budget, which is where most decisions become very real very quickly.
Budget, trade-offs and when bespoke joinery is worth it
Costs vary a lot, so I prefer to think in planning bands rather than fixed promises. The biggest variables are joinery complexity, electrics, painting, stair design and whether the room needs structural work before the bunks even go in.
| Option | Typical UK planning budget | Best for | Main trade-off |
|---|---|---|---|
| Freestanding bunk beds | £300-£1,500 | Quick updates and lower-risk projects | Least integrated, least tailored |
| Semi-built-in solution | £2,500-£6,000 | Spare rooms that need some storage and a cleaner finish | Still looks partly like furniture |
| Fully bespoke bunk room | £5,000-£15,000+ | Awkward rooms, holiday homes and premium family spaces | Higher cost and less flexibility later |
Those ranges are useful only if they are tied to the right outcome. If the room is used constantly, I would spend more on the structure, rails and storage than on decorative extras. If it is a guest room that gets occasional use, a semi-built-in solution often gives the best return. The final question is whether the room can still make sense five years from now, because that is where thoughtful design really pays off.
Design it so the room can change jobs later
The strongest bunk rooms are not frozen in one phase of family life. A child-friendly sleepover space should still work when those children become teenagers, and a holiday-home bunk room should still feel acceptable when adults use it more often than expected. I design for that shift by keeping the base architecture calm and the soft furnishings easy to change.
- Use neutral joinery. White, wood or muted colours age better than highly themed finishes.
- Keep the lower bunk versatile. A wider lower berth can make the room more useful for adults or older children.
- Make curtains and bedding replaceable. These are the cheapest way to refresh the room without rebuilding anything.
- Leave one wall adaptable. A future desk, wardrobe or reading chair should still fit if the sleeping needs change.
If I were planning one today, I would start with layout and headroom, then spend the remaining budget on joinery that removes clutter and survives changing use. That is what turns a bunk room from a novelty into a genuinely useful bedroom, and it is the standard I would aim for every time.