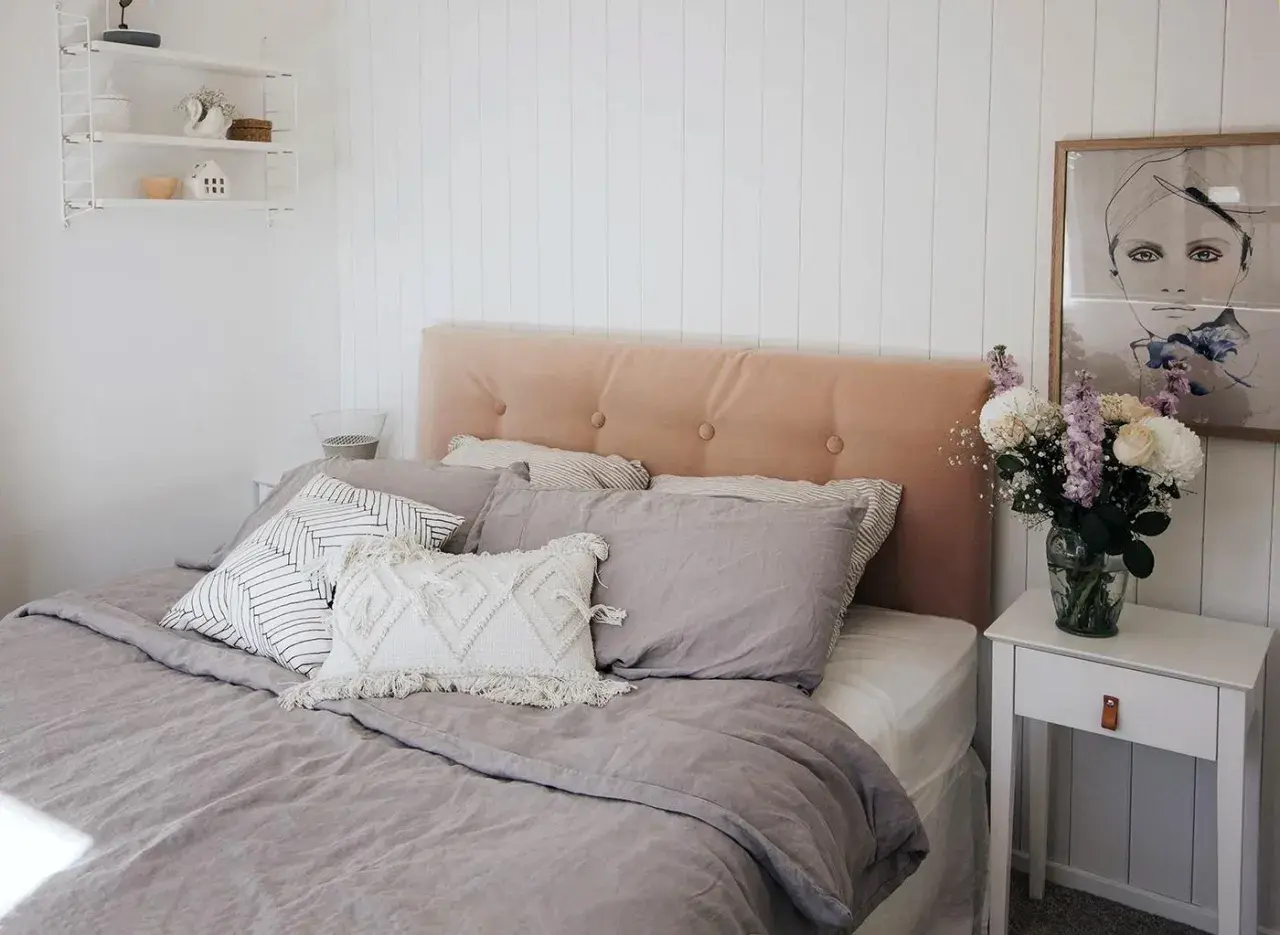
A DIY upholstered headboard can change a bedroom faster than almost any other single project. It adds softness, makes the bed feel finished, and gives you a chance to improve comfort without replacing the whole frame. The best results come from getting the proportions, padding, fabric, and fixing method right the first time.
What matters most before you start
- Plan the headboard width around your UK bed size first, then decide how tall you want it to sit above the mattress.
- A simple build usually needs plywood, 25-50 mm foam, batting, upholstery fabric, adhesive, and a staple gun.
- In the UK, a basic version often costs about £70-£180 if you buy materials new; premium fabrics can push that higher.
- For a bedroom, 25-30 mm foam gives a neat profile, while 50 mm feels softer for reading in bed.
- Wall type matters as much as the headboard itself, especially on plasterboard where the wrong fixing will fail.
- If you want a lower-waste result, use FSC-certified timber, low-VOC adhesive, and a fabric you can re-cover later.
How to size it for a UK bed without guessing
Before I cut a single board, I decide the size from the mattress, not from the fabric. That keeps the proportions honest and saves you from building something that looks too narrow once the pillows go on. For most bedrooms, I prefer a headboard that matches the bed width or extends a little beyond it for a more tailored look.
| UK bed size | Mattress size | Practical headboard width | What it suits best |
|---|---|---|---|
| Small double | 120 x 190 cm | 120-130 cm | Compact rooms and guest spaces |
| Double | 135 x 190 cm | 135-145 cm | Most standard bedrooms |
| King | 150 x 200 cm | 150-160 cm | Rooms that can carry a fuller look |
| Super king | 180 x 200 cm | 180-190 cm | Larger rooms and a more hotel-like feel |
Height is the part people usually misjudge. I like to work from the mattress top and aim for roughly 55-75 cm of visible headboard for everyday comfort, then push higher only if the room has enough wall space to handle it. If you read in bed a lot, a taller backrest feels better than a low decorative panel. Once the size is set, the rest of the project becomes much easier to control.
Materials and tools that give the cleanest result
For a solid, long-lasting build, I would rather use fewer materials of better quality than chase a bargain that warps or tears. Plywood is usually the safest base because it takes fixings well and holds its shape better than thin MDF in a bedroom that may be moved, leaned on, or re-covered later. If sustainability matters to you, choose FSC-certified timber where you can and keep the finish simple enough to refresh instead of replace.
| Item | Typical UK cost | Why I would use it |
|---|---|---|
| 12 mm plywood | £20-45 | Stable base that accepts staples and fixings well |
| 25-50 mm upholstery foam | £25-60 | Creates the soft front layer; thicker foam feels plusher |
| Batting or wadding | £10-20 | Smooths the surface and softens the edges |
| Upholstery fabric | £20-100+ for 2-4 m | Defines the look and how easy the headboard will be to clean |
| Spray adhesive and staples | £15-35 | Keeps the layers in place and finishes the edges neatly |
| Fixings or hanging hardware | £10-25 | Secures the headboard safely to the wall or frame |
The tool list is straightforward: tape measure, straight edge, pencil, saw or jigsaw, utility knife or serrated knife for foam, staple gun, drill, and a level. If the fabric has a visible weave or pattern, add a little extra to the shopping list so you are not forced to join pieces awkwardly. A weekend is a realistic timespan for a simple panel if you are not adding tufting or a complex shape.
How I would build the panel step by step
The cleanest builds are the ones where each layer has a clear job. The board gives structure, the foam gives cushioning, the batting removes hard edges, and the fabric makes everything look intentional. I keep the process simple and work from the centre outward so the front stays smooth.
- Measure the bed and mark the board to size. I usually leave just enough extra width for a balanced look, but I do not make the panel so wide that it crowds bedside tables.
- Cut the plywood and soften the corners slightly. Even a small radius on the edges helps the fabric wrap better and keeps it from wearing thin over time.
- Attach the foam to the front face. A light spray adhesive is enough for most projects, and a long serrated knife gives a cleaner cut than scissors.
- Wrap the panel in batting. Pull it smoothly over the foam and staple it to the back, leaving enough slack to avoid compressing the cushioning.
- Lay the fabric face down and place the padded board on top. I usually leave about 10-15 cm extra around every edge so there is room to pull and staple comfortably.
- Staple the fabric from the middle of each side and work outward. This keeps the front taut and prevents one corner from becoming tighter than the others.
- Fold the corners neatly and trim any bulk. On curved or rounded shapes, small relief cuts in the excess fabric help the layers sit flat.
- Finish the back and add the fixing hardware. If you want a fully polished result, keep the back tidy too, because it makes later re-covering much easier.
If you want buttons, deep tufting, or a stitched channel pattern, mark those points before the foam and fabric go on. That detail is far easier to build into the panel at the start than to retrofit later. Once the panel is covered, the decision becomes how you want it fixed to the room.
Which fabric and padding work best in a bedroom
Fabric changes the whole character of the headboard, so I choose it for both feel and maintenance. A soft linen or linen blend looks relaxed and natural, but a recycled performance weave is usually easier to live with if the room gets heavy use. Velvet looks rich, yet it does need more care and shows marks faster than a flatter weave.
| Fabric type | Best for | Trade-off |
|---|---|---|
| Linen or linen blend | Calm, breathable, natural-looking bedrooms | Can crease and show texture more clearly |
| Wool blend | Durability and a warmer, softer feel | Usually pricier than basic cotton blends |
| Recycled polyester performance weave | Easy cleaning and a lower-waste choice | Less organic in feel than natural fibres |
| Velvet or chenille | Hotel-style softness and a richer look | Shows pressure marks and needs more care |
| Faux leather | Bold, wipe-clean styling | Can feel less breathable in a warm bedroom |
For foam, I normally choose 25-30 mm when I want a neat, tailored finish and 50 mm when the bed is used for reading or lounging. That thickness range gives you enough comfort without making the edges bulky. If you want a lower-footprint build, look for recycled-content fabric, low-VOC adhesive, and a cover you can replace later rather than a one-way build that has to be thrown away.
How to mount it safely and choose the right fixing method
The fixing method matters more than people expect because a headboard is not static furniture. It gets bumped, leaned on, and nudged by the bed frame, which means the mounting has to handle movement as well as weight. For that reason, I never treat wall fixings as an afterthought.
| Method | Best for | Pros | Watch out for |
|---|---|---|---|
| Bed-frame brackets | Frames that already have headboard mounts | Easy alignment and simple removal | Needs compatible hardware |
| French cleat | Clean wall-mounted installs | Hidden, strong, and easy to level | Needs accurate installation and the right wall fixing |
| Direct screws into battens | Simple builds and heavier panels | Low-cost and sturdy when done well | Must suit studs, masonry, or proper plasterboard anchors |
| Freestanding feet | Rentals and rooms where drilling is not ideal | No wall damage | Takes more floor space and can move if knocked |
In a UK bedroom with plasterboard walls, I would not rely on light-duty hooks or generic plugs for anything that will be leaned on regularly. Find studs where you can, or use fixings designed for the wall type and the real load. If you are renting, a freestanding version or frame-mounted version is usually the least stressful option, and it still gives you the upholstered look without turning the wall into a project.
The mistakes that make a neat build look sloppy
Most DIY headboards fail in the same few places, and none of them are hard to avoid once you know what to watch for. The mistake is usually not the upholstery itself; it is the planning around it.
- Using foam that is too thin. The board telegraphs through the fabric, and the headboard feels hard instead of cushioned.
- Skipping batting. Without it, corners look sharper and the surface can show small irregularities.
- Not centring the fabric first. Even a slight shift becomes obvious once the board is mounted.
- Ignoring the fabric direction. Velvet, chenille, and woven patterns can look uneven if the pile or repeat runs the wrong way.
- Overloading the corners with bulk. The back may be hidden, but bulky corners still pull the front out of shape.
- Fixing it too low. If pillows hide the top edge, the whole piece looks smaller and less deliberate.
I also see people choose decorative fabric that is beautiful but impractical for a bedroom. A loose weave can snag, a very pale colour can pick up marks quickly, and a shiny finish can look harsher under bedroom lighting than it did in the shop. A slightly quieter fabric often ages better, which matters more than a dramatic first impression. Once you avoid those traps, keeping the headboard looking good becomes much easier.
The small choices that make it worth keeping for years
The smartest part of this project is not the front finish. It is building the headboard so it can be refreshed without starting again from scratch. I like to keep the measurements, foam thickness, and fixing layout written down before I close the back, because that turns a future re-cover into a quick repair rather than a full rebuild.
If you expect the room to change often, keep the design simple and the fabric neutral. That gives you more freedom with bedding, paint, and curtains later, and it also means the headboard can stay in place while the room evolves around it. A well-made upholstered panel should feel calm and durable, not like a seasonal accessory that needs replacing every time the room changes mood.
When I build one of these for a bedroom, my aim is always the same: soft enough to be useful, sturdy enough to stay put, and plain enough to still make sense after the next refresh. Keep the structure honest, choose materials you can live with, and the finished piece will do its job quietly for years.